

Hand drawn renderings, a thing of the past.
Who does hand-done renderings for work anymore? Search ID renderings on Behance, Pinterest or IG and you’ll find pages and pages of really great renderings. I still appreciate really great renderings as I can’t do them anymore. Over time, our tools have shifted from Paper to Tablets, Hand Modeling to CAD, Renderings to Keyshot and now AI. With all these new tools at our disposal, what value do those nice hand done renderings hold today?
Working sketches vs illustrations
Let's establish some semantics for this post. Here is the way I think of the terms.
Working sketches convey your ideas quickly and with clarity. They also leave some room for imagination. They are done with minimum effort and deliver maximum clarity. They can show the overall gesture of a design, a portion of a design, describe detail, mechanical ideas, and demonstrate product interaction. Minimum effort allows more time to iterate. These sketches typically require additional passes to resolve and refine the idea. Working sketches are used throughout the entire design process.
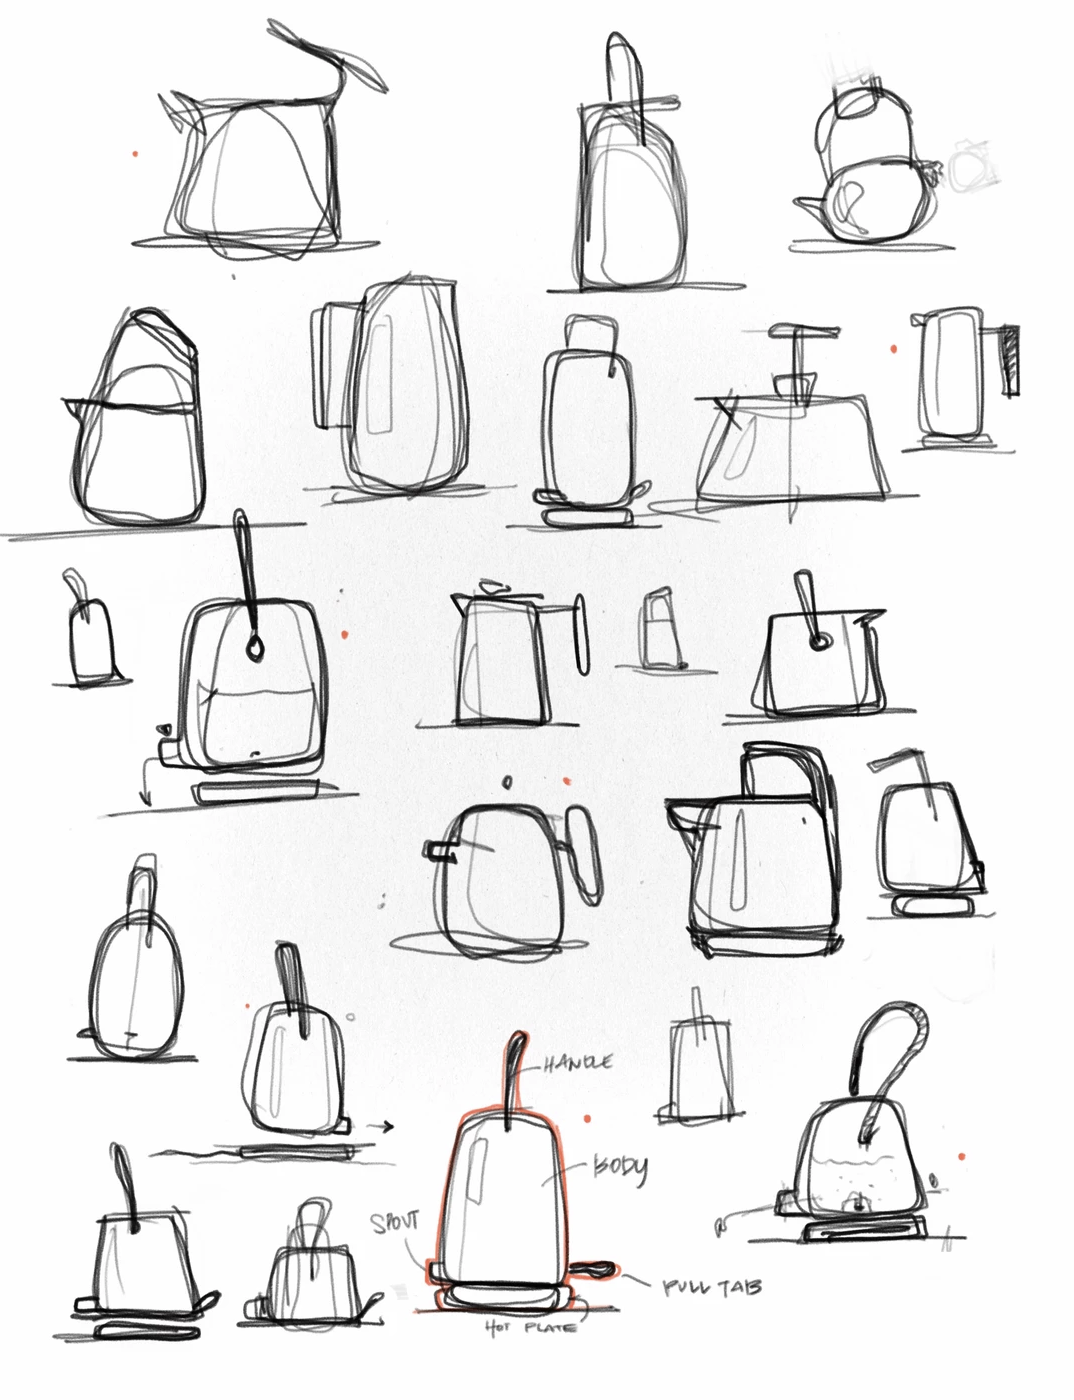
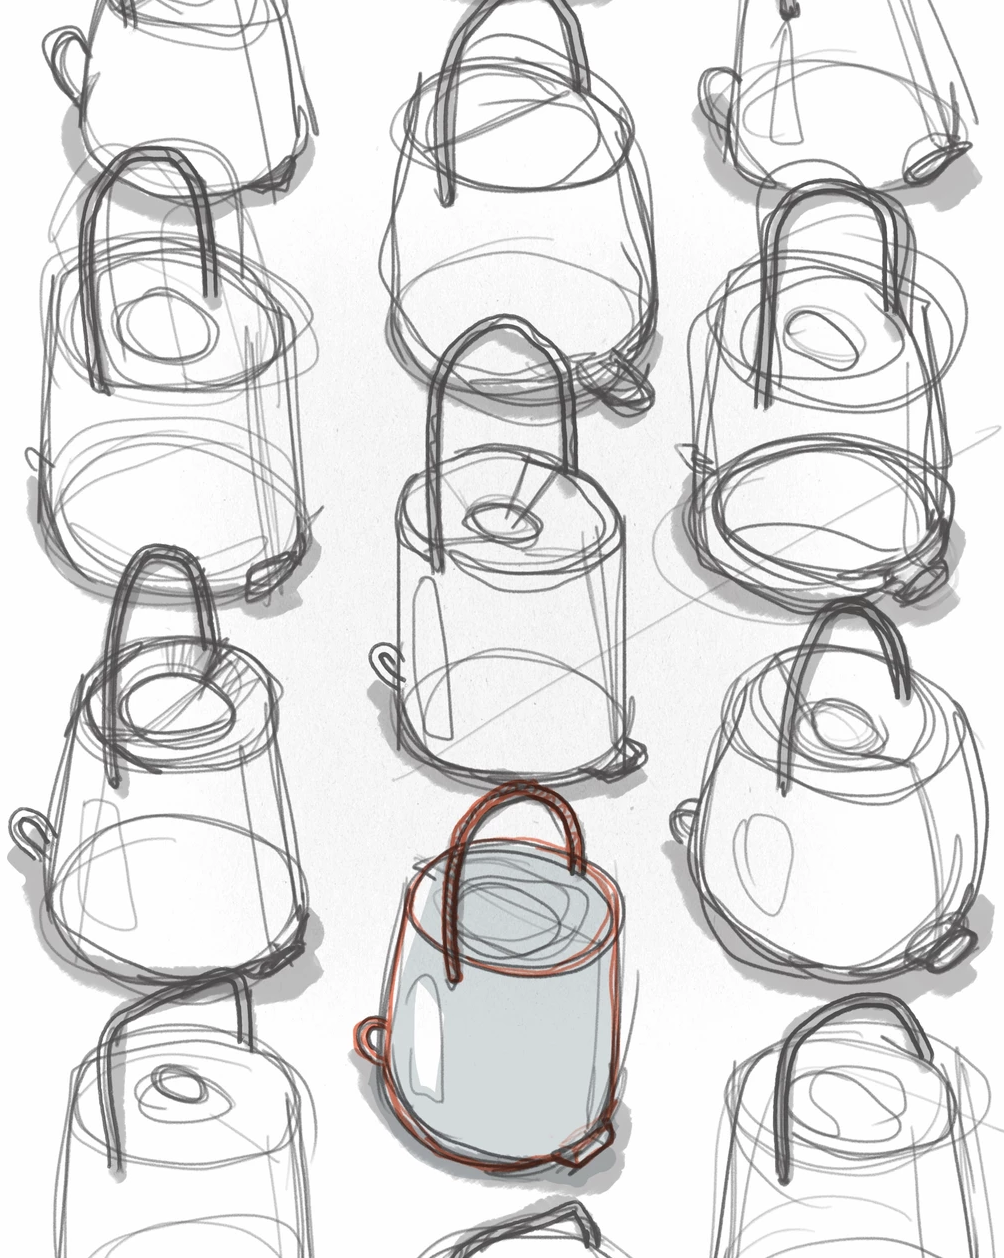

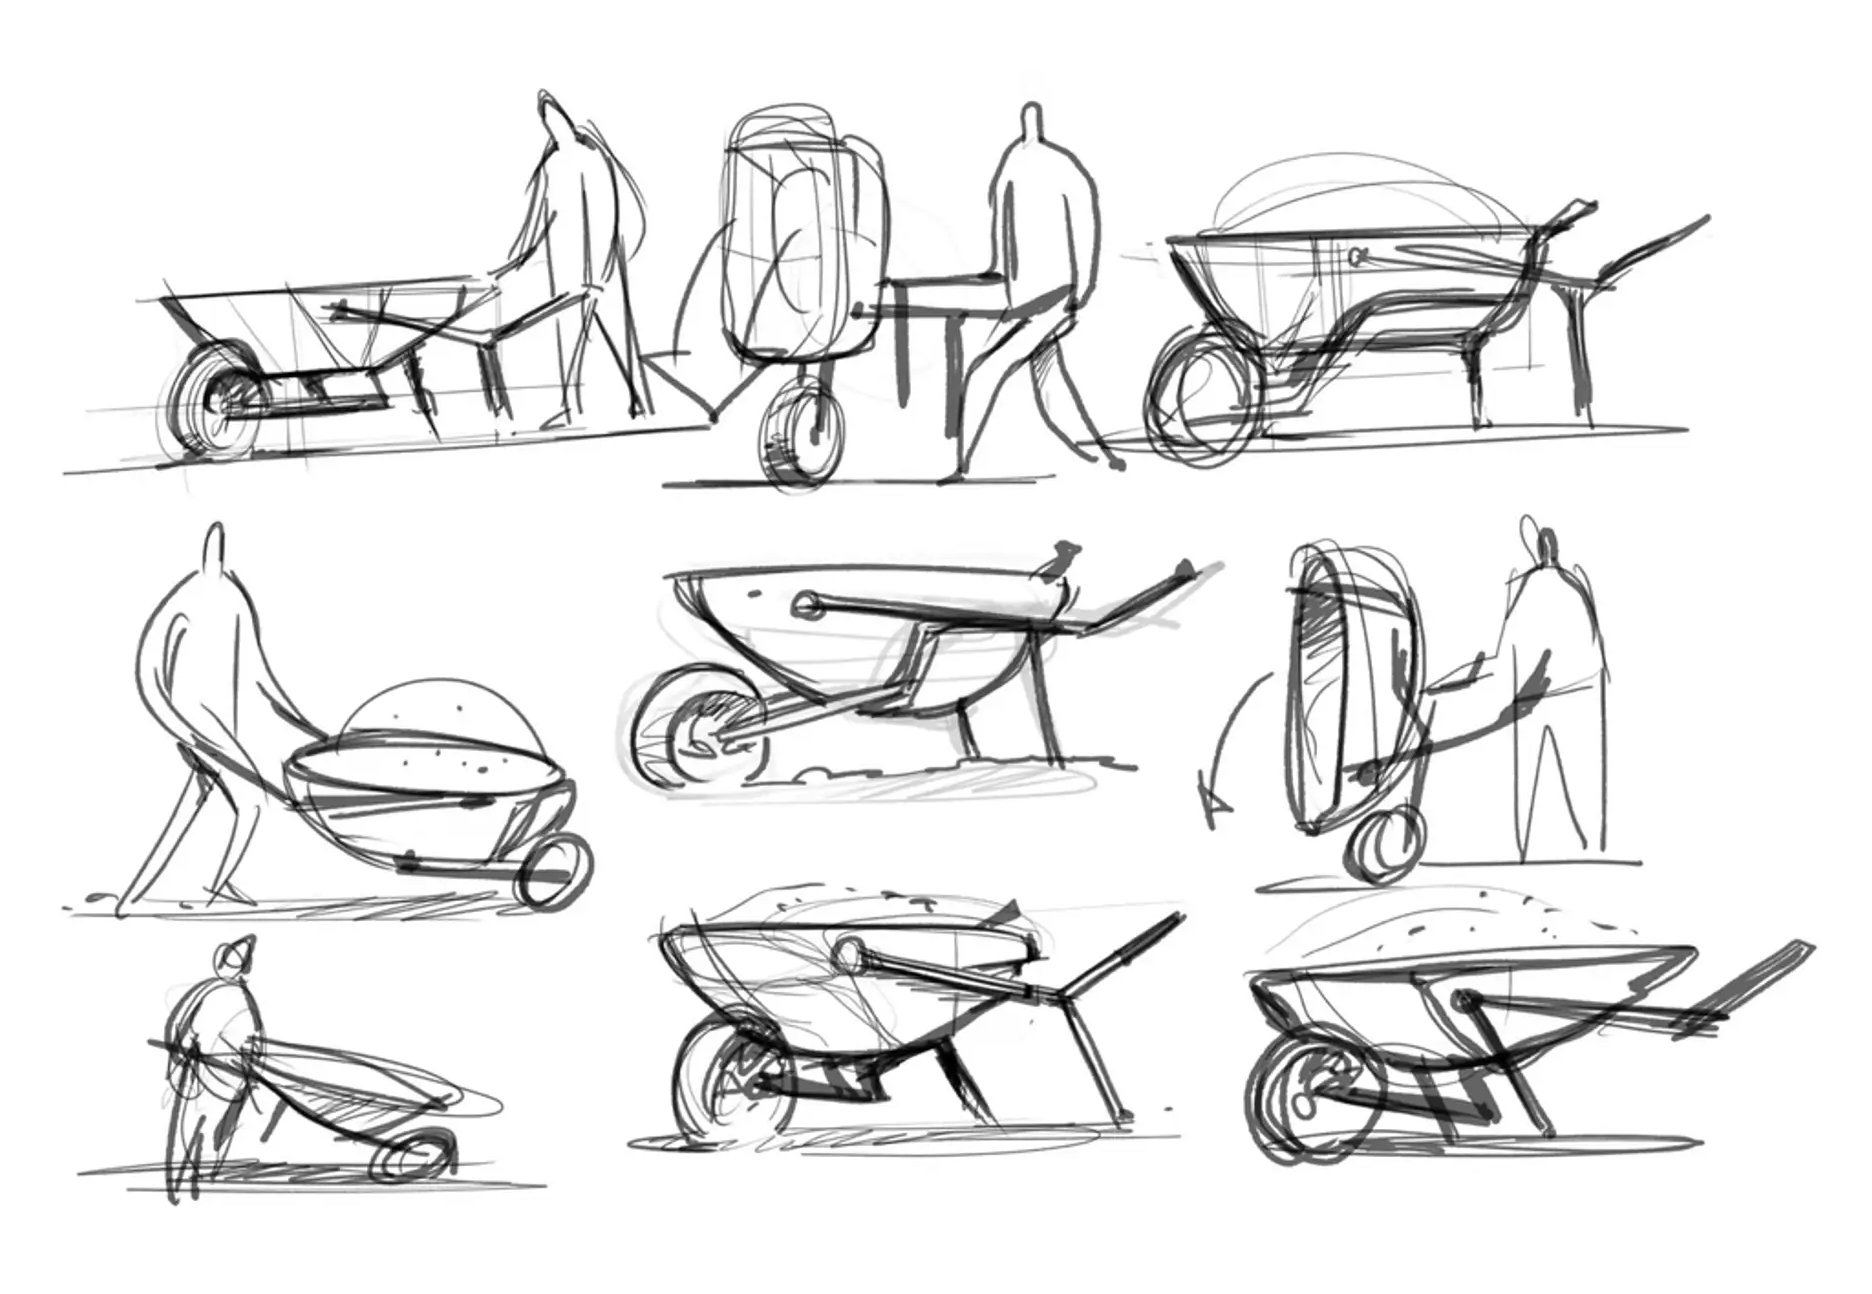
Above is a nice progression of working sketches: thumbnails, product usage, sketch over CAD and an image that starts to feel like an illustration with working sketch on the side in the last frame. Sketches by Matt Marchand
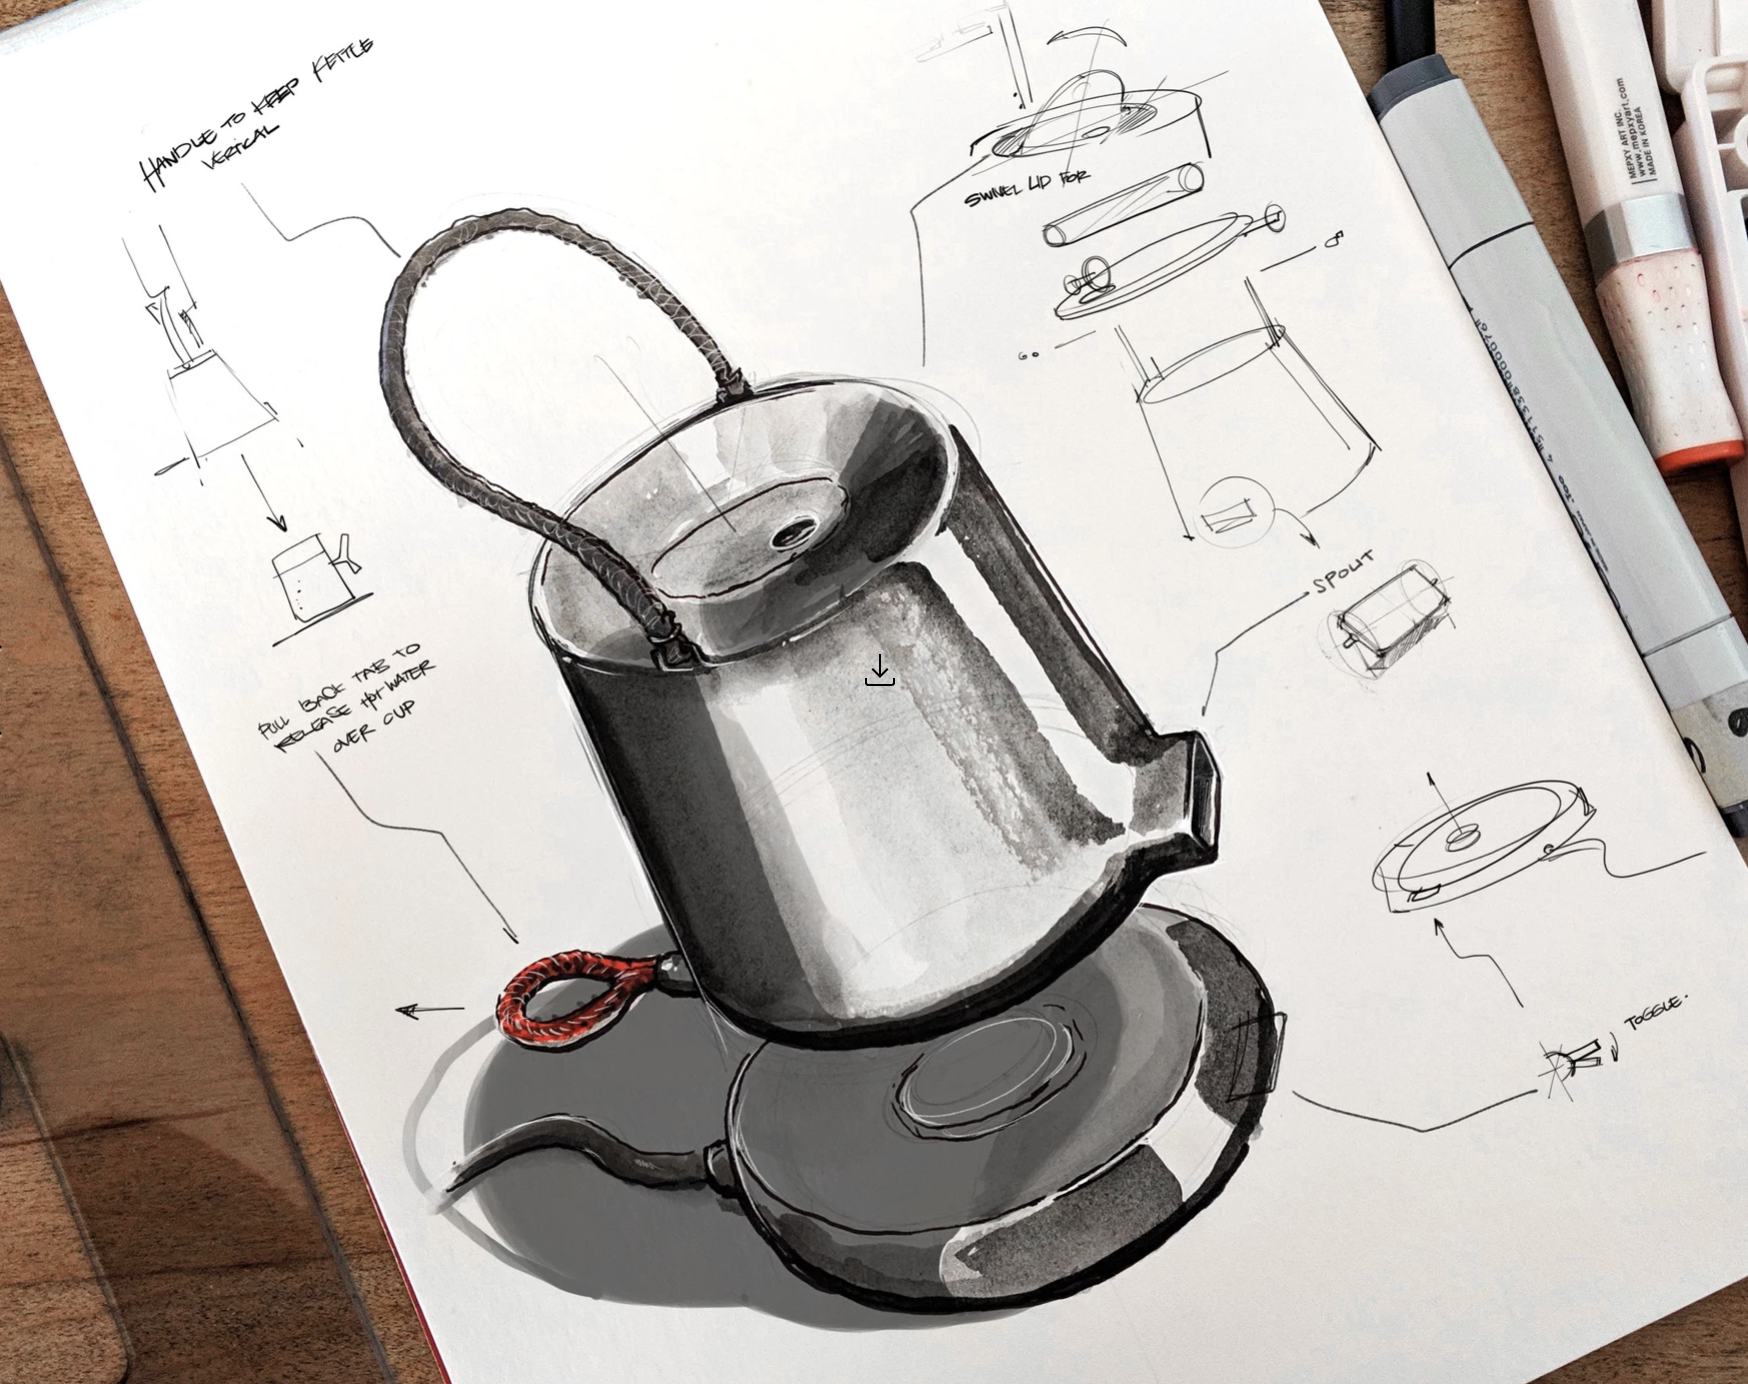
Illustrations portray a product with more accuracy. They are high on clarity the scale and depending on your skill, take time to create. While there might be room for interpretation, surfaces have more definition, part breaks are clear, materials and textures are apparent as well as color selections. At certain stages, you’ll need to be very clear with your design intent, especially when presenting to non designer clients and stakeholders. Illustrations are great for this purpose and can be used throughout the design process as well.
A good sketch does not make a good designer
I’ve worked with some very good designers who don’t draw really well. So they’ve learned how to quickly build up CAD to show the idea with more clarity.
Pointing at nice illustrations as examples, I’ve heard some designers say you need this in your portfolio to get a job and to make it to the next review stage. I don’t think this is true with today’s tools. Sometimes reviewers can fall into the trap of seeing great illustrations in a portfolio and keep the portfolio moving through the review process. When you get beyond the cool image, you might discover the design itself is just not that good. A good sketch does not equate to a good design. And a person that sketches really well, may not be the best designer on the block. Of course, if you can sketch well, do it quickly and the design is good, by all means, find ways to put those sketches in your portfolio! Better yet, develop you working sketch skills and include them as part of your storytelling process.
Your sketches show intent, like it or not!

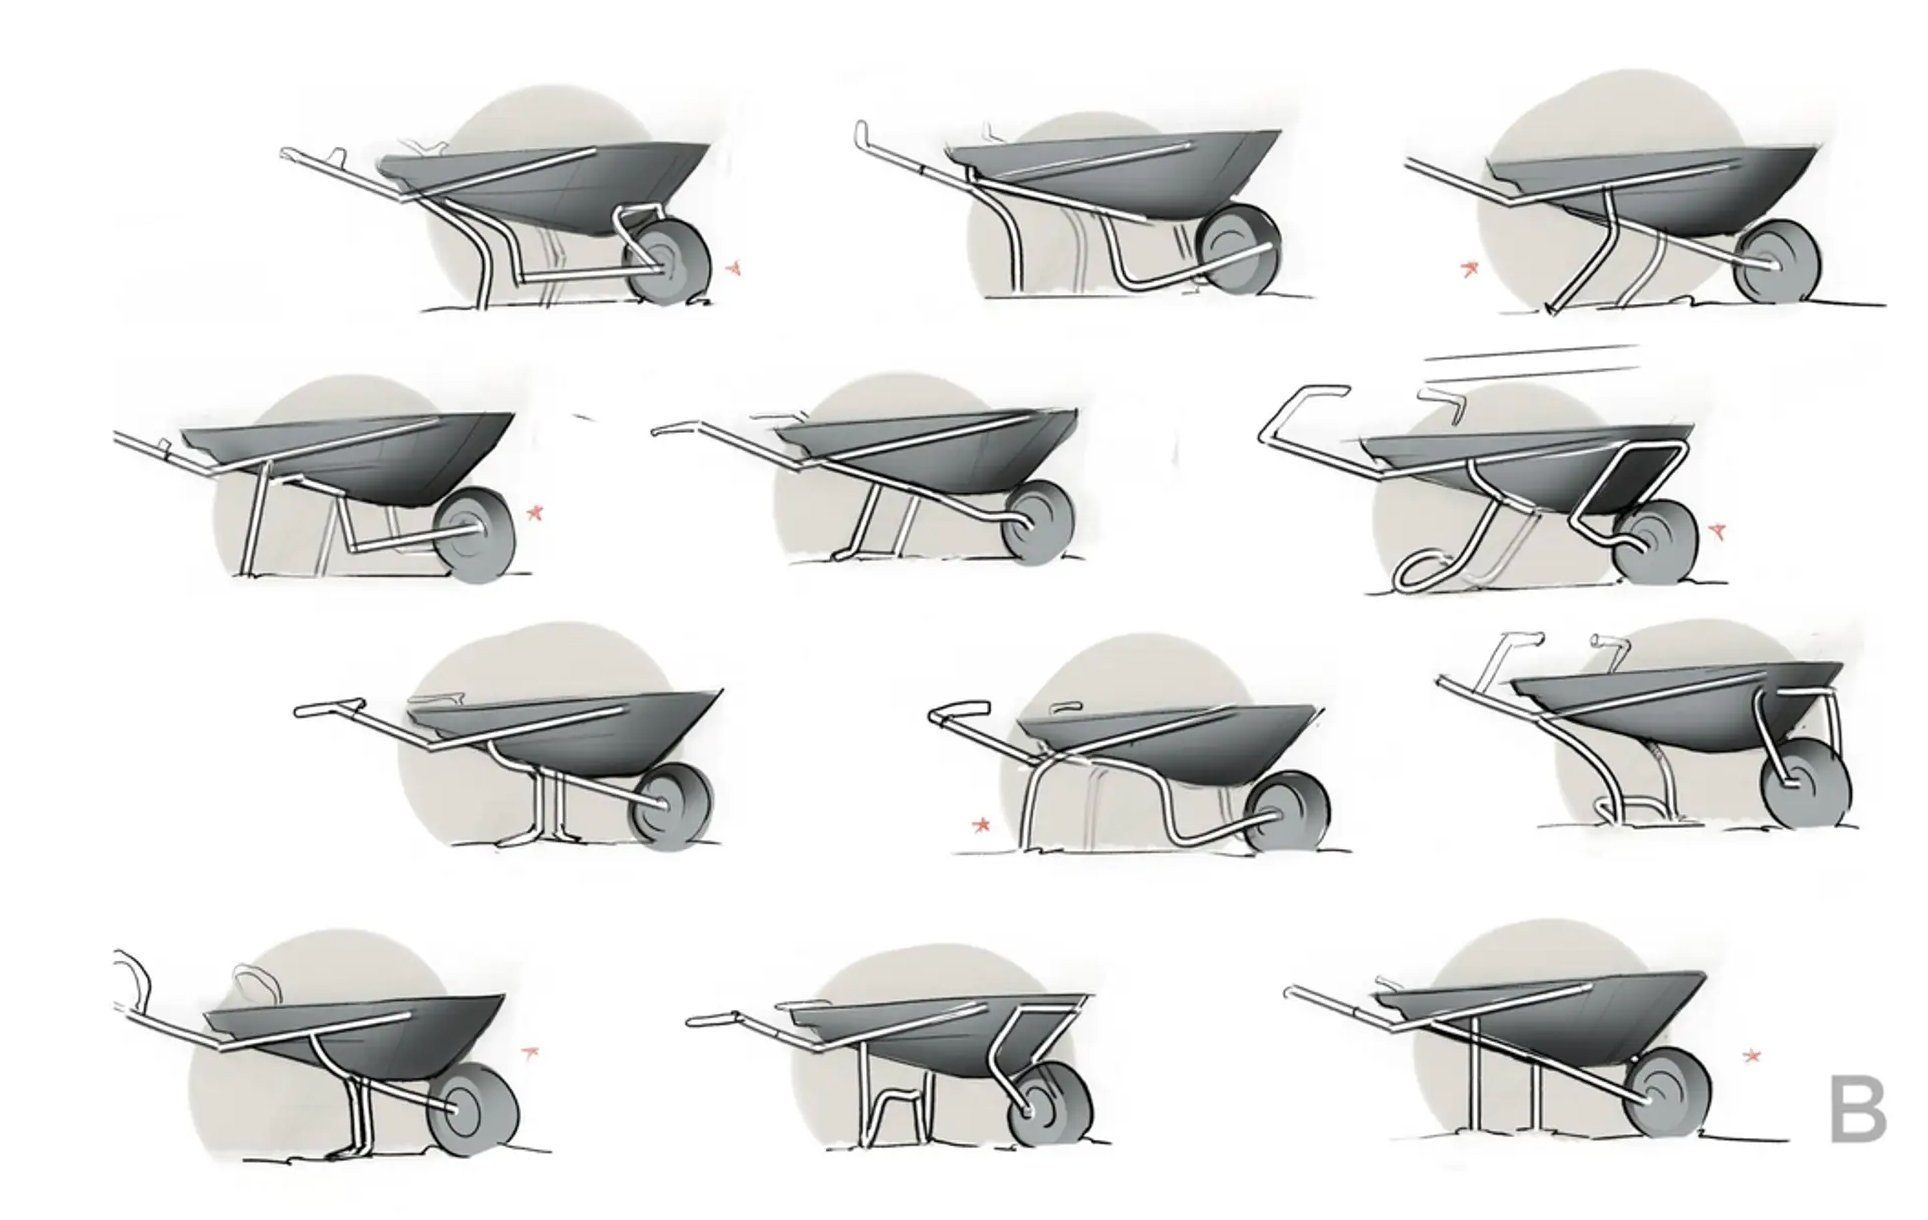
Great working sketch: Loose, maybe some digital erasing, and not overworked. All the elements of this design are clear. (Overworked = lots of line and circle snaps or use of lots of edges) Take a look a the project, the design work is solid. Sketch by Matt Marchand
“Why is that cylinder at a 45 degree angle on that plane? It’s not just poor perspective right?” Make your working sketches descriptive and clear. People interpret and formulate opinions from what they see. Angles, proportion and curvature are conveyed from a simple sketch. Don’t cast doubt in a reviewer’s mind. Questioning whether the perspective or an angle is right or wrong is not a great way to start. Sketches are created to facilitate a design dialog. Don’t let poor basics get in the way of communicating great ideas.
The Basics
Sometimes, a hand done “style” is part of the art direction for the given presentation. In my opinion, the effort it takes to create those illustrations are not practical in day to day work situations. Working sketches and quick CAD are efficient and result in additional time to explore more broadly. To create clear working sketches one still needs to understand the basics. I’ve tried to break down what’s at the core, I’m sure I’ve missed a lot. With the attempt to keep the list short, here’s my take:
Perspective: Develop good linework and be able to draw and spin the basic shapes in every direction and viewpoint. Then be able to combine shapes together. (like that cylinder that was supposed to be perpendicular to the plane)
Contour: Simple lines that can show large or small surface changes as well as highlights cast from light. I’ve heard many people say, “Oh, now I see what you mean” after drawing in a few contour lines.
Lighting: Highlights and shadows transform flat planes to those with dimension. Lighting is critical in describing form.
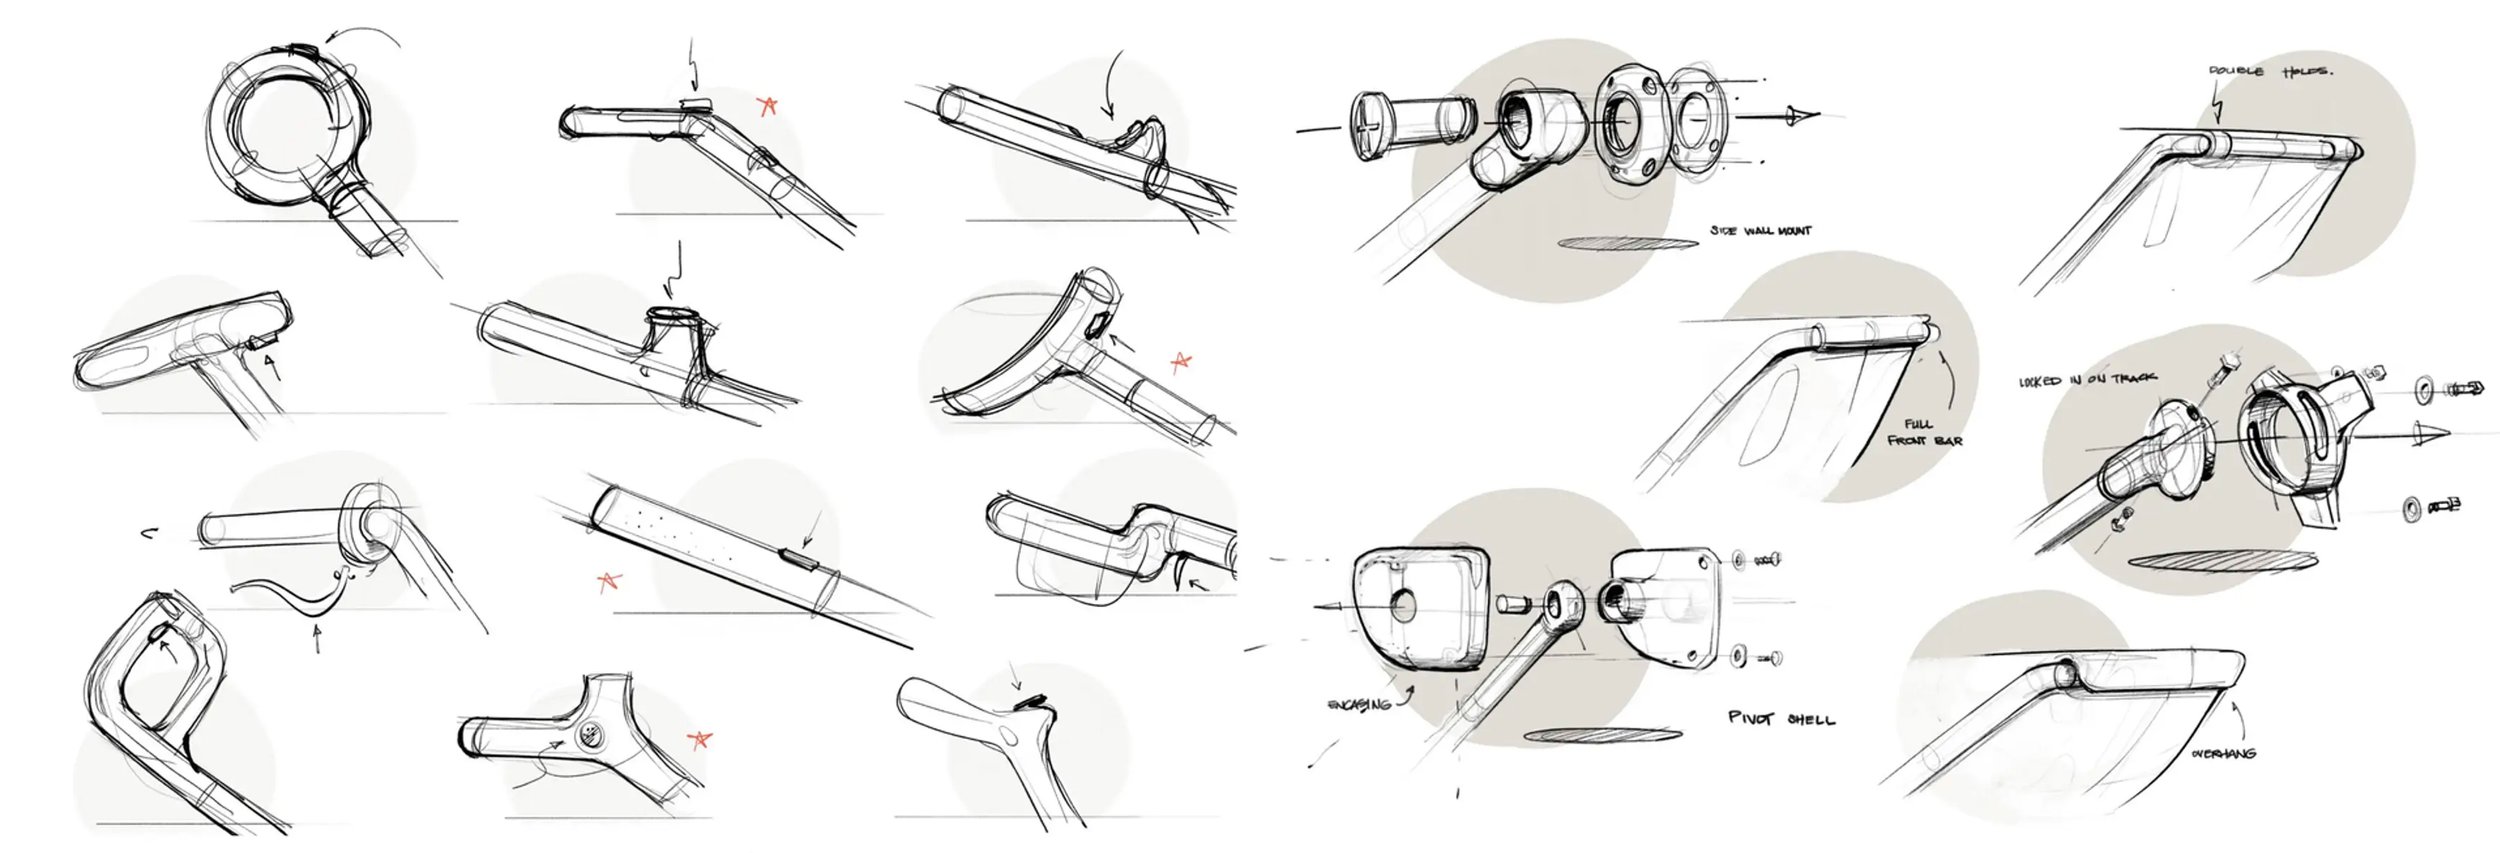
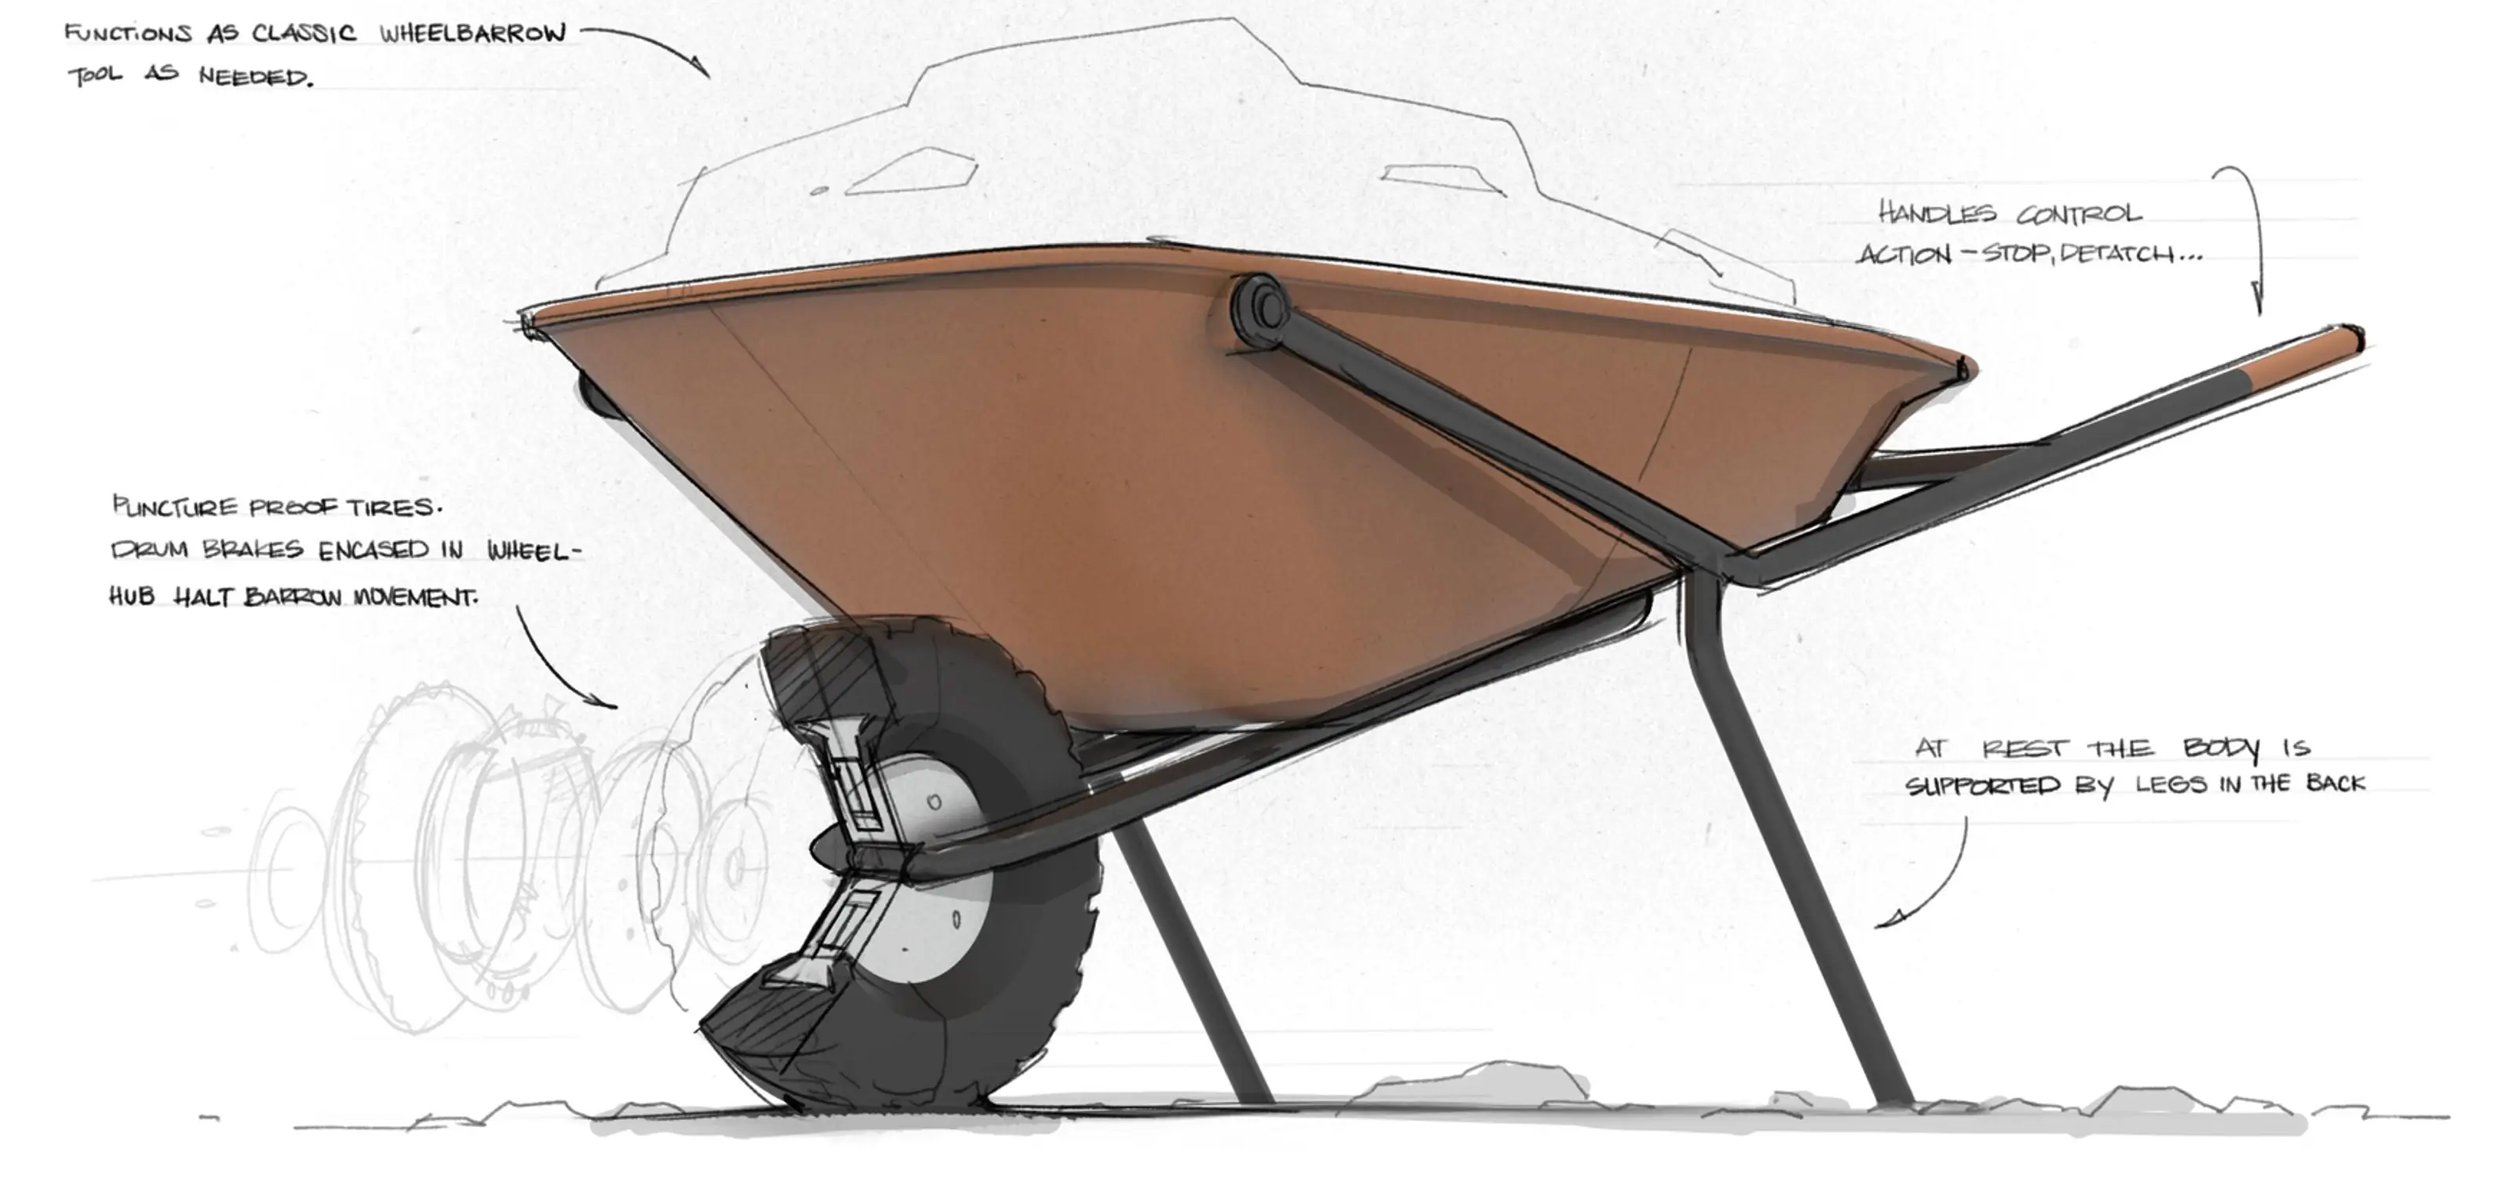

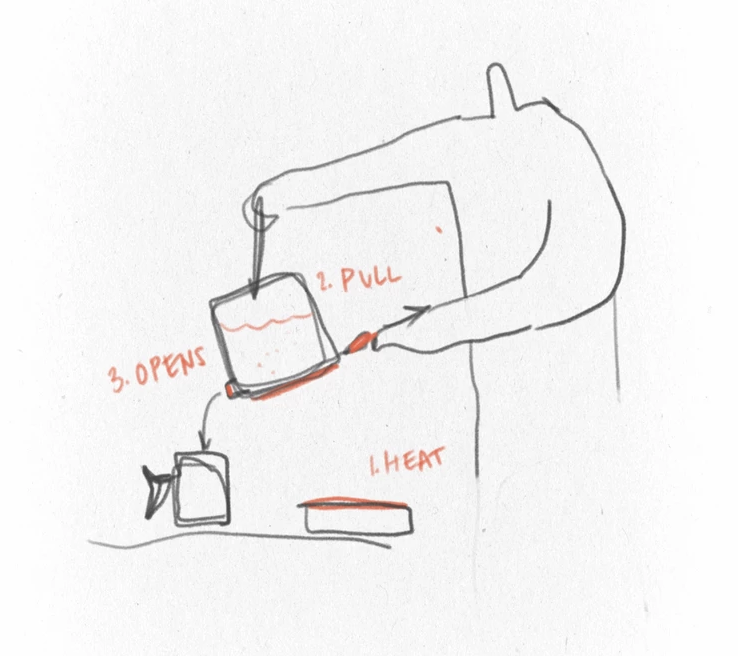
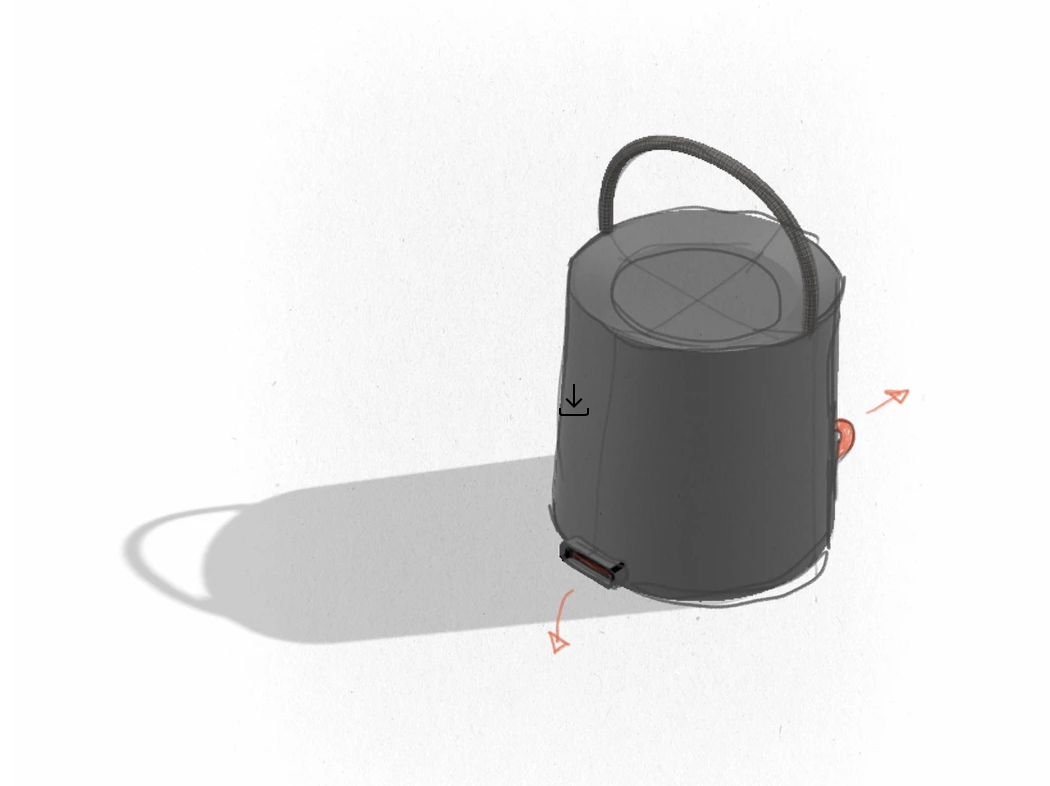
Here is a great series of working sketches showing product usage, handle iterations and detail. The last 3 images border on illustration. 1 CAD model could have be used for the last 3 images. To reiterate, if you’ve got the skills to do 3 views faster than 1 CAD model, go for it!
Bonus working sketches
White boarding: learn how to do this! Learn to draw big enough for a room of 15 people to see the sketch. Drawing with a fat white board marker while standing up is harder than it seems.
Storyboarding: Use what’s right for the moment, quick, minimal effort to show more of a scene or product flow typically works well for the ID process. Comics are storyboards, we buy the “illustrated” product. Working sketches were likely done to build the storyline and develop the scenes. Learn how to draw people quickly.
Sketch over CAD: Use CAD to build perspective, cast light and shadow and maybe texture, then add detail, contour and adjust shape by hand. The key here is to keep it fast, don’t over build the CAD.
Mock ups vs Appearance Models. Mocks ups are like working sketches. They are built to inform and iterate. Keep them simple with just enough clarity to solve a problem. Appearance models are used to show the design with much more clarity and detail.
Mechanical work ups. Same rule applies here, minimum effort, maximum clarity.

Above is a series of bonus working sketches that maintain minimum effort and maximum clarity.

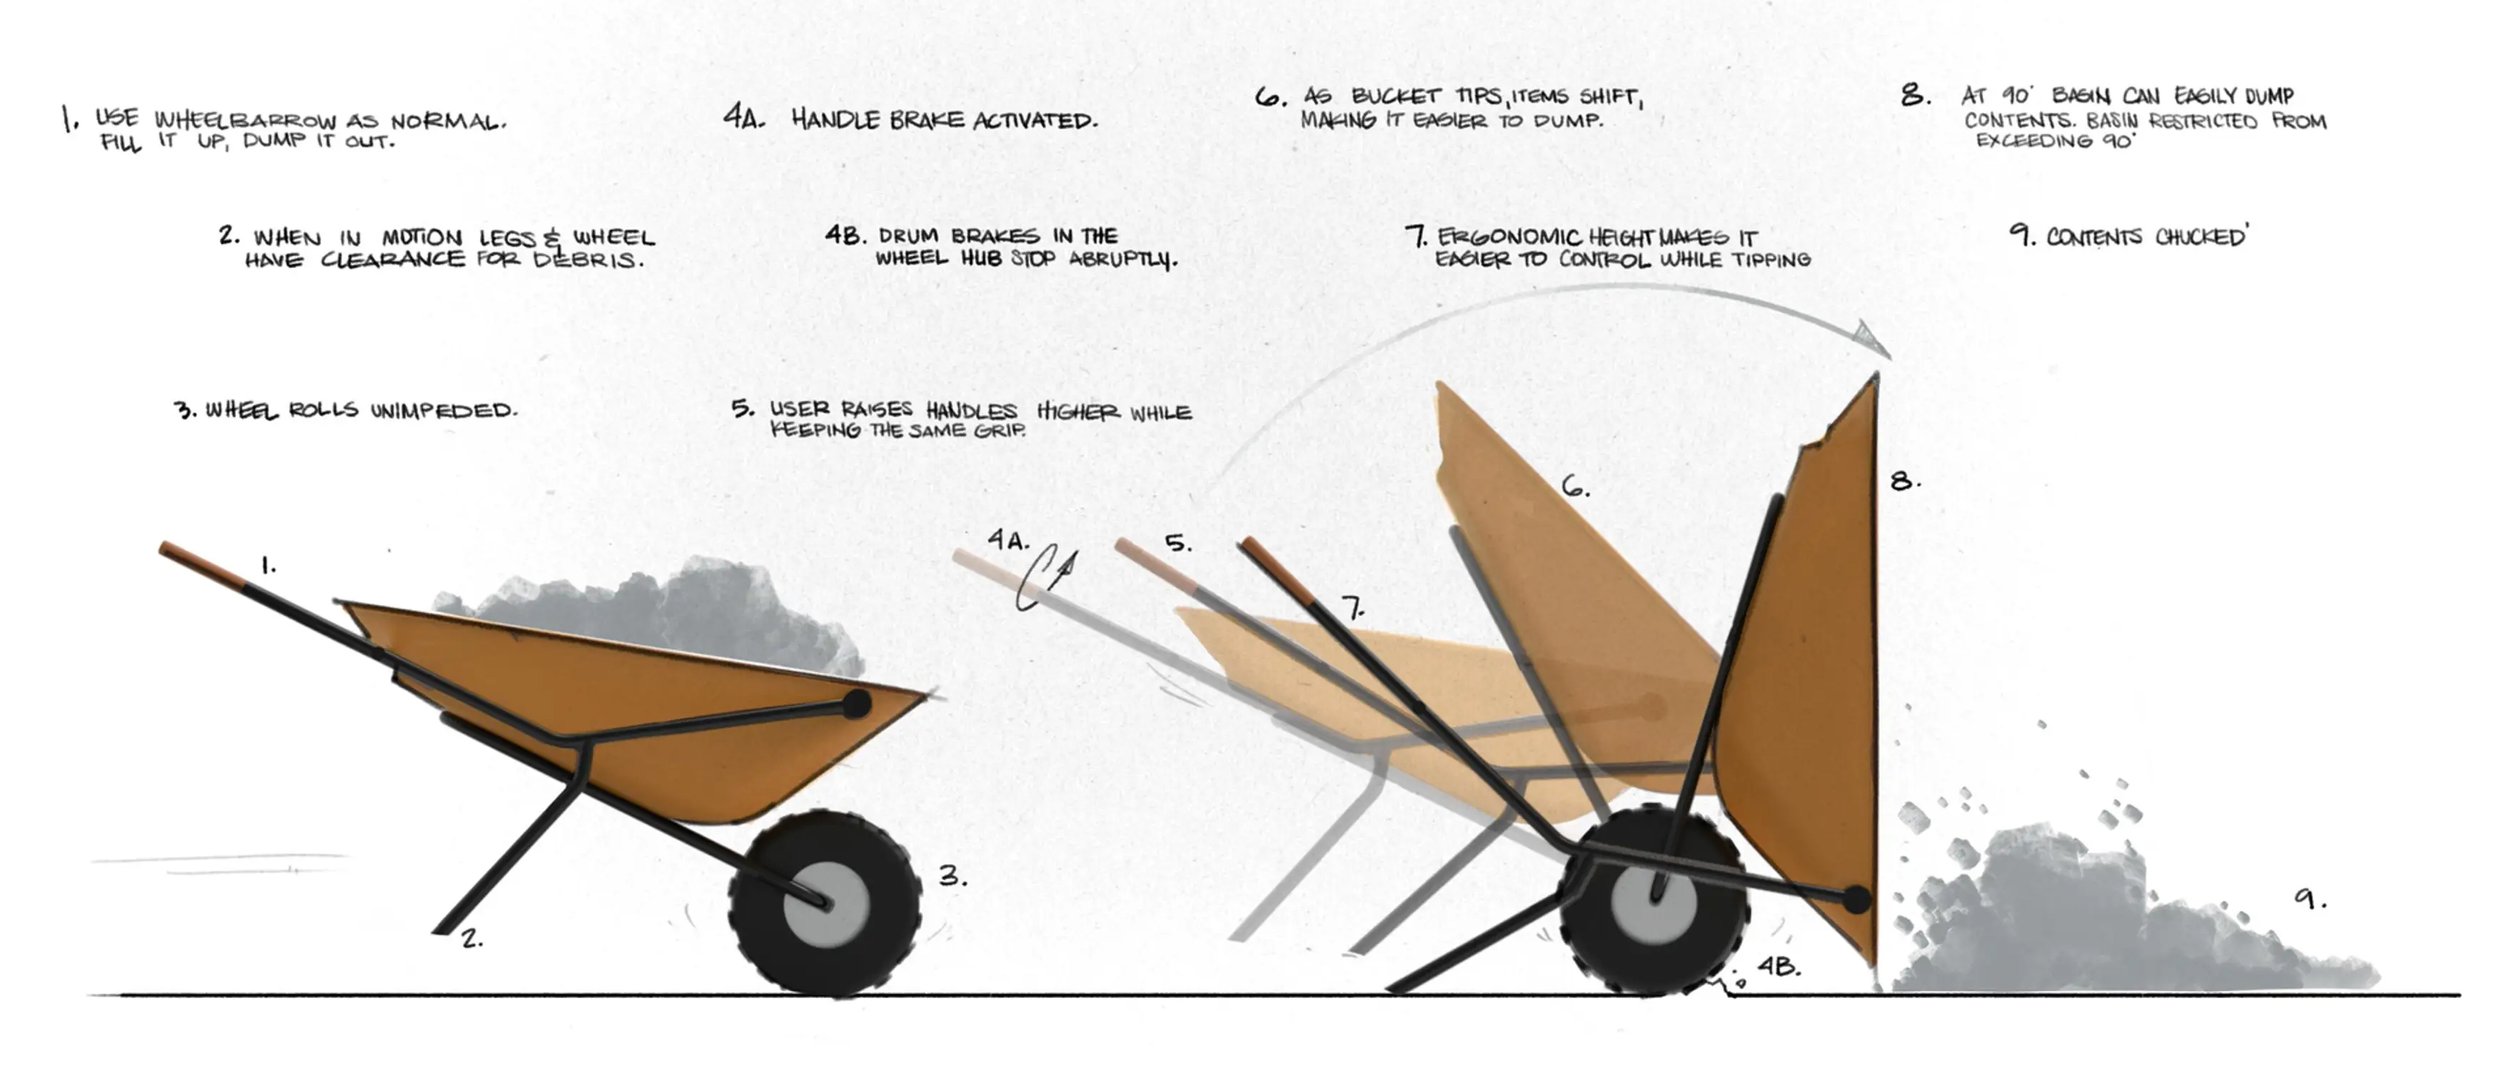
Sample of a mechanical work up. It borders on illustration, but a hand done sketch might have been the fastest way to convey what’s happening here. sketch by Matt Marchand.
Drawing the line, pun intended
Practice creating working sketch skills so you become natural and fast with just a pen (real or digital). Heavy reliance on templates, edges or curvature snaps in Procreate might mean you're slowing yourself down. So where is the line from turning a sketch into an illustration? Well that depends a bit on how fast you work. Look back at your work and ask, “Could I have done this quicker and with better clarity in CAD?”, if so, maybe you’ve gone too far. Additionally, once in CAD, you can create multiple views or animations to describe your ideas.
A caveat? There are certainly some industries where I think “better” sketching or “looser” illustrations are still faster than CAD like footwear, soft goods and transportation, but I have also seen how AI tools are even being used for these industries. Since I don’t have a lot of context within those industries, I’m guessing a bit at how those designers are working today.
Gauge your own abilities and make use of tools that give you more time to design and iterate.
How about AI?
AI generated work produces both working sketches and illustrations in one shot. AI images typically still have lots left to the imagination and require additional passes for refinement. They are also high on the scale of realistic renderings of details, surfaces, finishes and materials. Here’s more about AI generated work in my post here but I don’t think AI itself is replacing hand done illustrations yet.
Designing, not illustrating
Our role as designers is to solve problems that include aesthetic, functional, experiential challenges for the products we are designing. Visualization is a critical part of our workflow. Leave the laborious hand illustrations to the illustrators or do it for fun. If you need a detailed, realistic image, do it in CAD/Keyshot. A key to successful exploration and discovery is being able to iterate. Sketch with minimum effort and maximum clarity.
A huge Thank you to Matt Marchand and Grayson Mendivil, SJSU alumni who have graciously let me use their work for this post. Great sketches AND from looking at their websites, solid design work. Check out their sites, they are awesome.
UPDATE 11/3/22
Bottom line, keep doing those working sketches!
Minimum effort Maximum clarity is about the time you spend creating an image relative to the clarity of idea that needs to be conveyed. Point here is to think about what technique/tools will really give you the clarity you need for the given time you have. Will it be hand done renderings/illustrations or Keyshot or a VR model and environment?
Establish Who you are Conversing with and What Statement you want to make. This will also inform level of effort and clarity.